

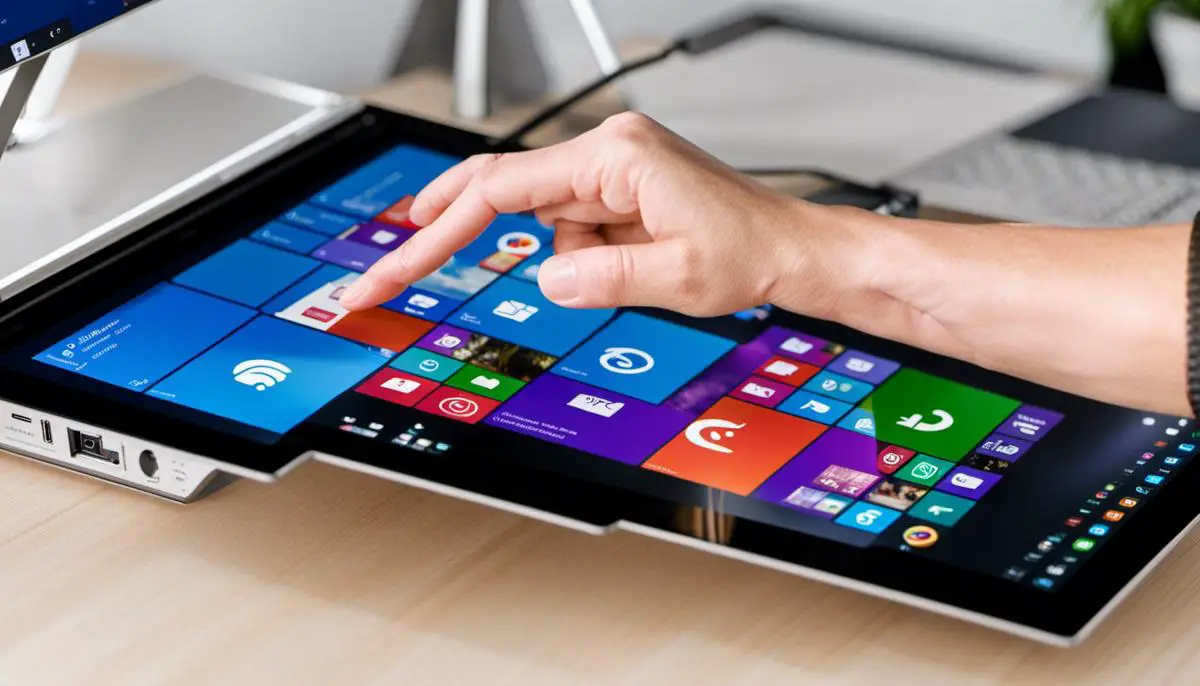
Navigating the technological landscape of the 21st century can seem daunting with its constant evolution and the development of new features and functionalities. One of these advancements is the touch screen technology, now prevalent in laptops and desktops running Windows 11.
Understanding how these touch screens work and mastering the Windows 11 settings is the key to unlocking the ability to control this innovation according to your needs.
This essay will guide you through a comprehensive journey to understand the underlying technology, navigate the settings effectively, and eventually learn how to turn off touch screen feature when required.
Table of Contents
Understanding how to turn off touch screen
Understanding Touch Screen Technology in Windows 11
Touchscreen technology in Windows 11 is an integrated feature that enables users to interact with their devices using touch gestures. Built on capacitive technology, touch screens respond to the electrical charge produced by your fingers or a stylus pen, allowing you to perform tasks without using a keyboard or mouse. Touch screens are commonly used in devices like tablets, smartphones, and certain types of laptops.
This technology operates by having a grid of micro-fine wires or sensors embedded within the screen. When you touch the screen with your finger or a stylus pen, it disrupts the device’s electrical field. This disturbance is recognized by the system software and translated into coordinate points which carry out the action you intended, like clicking a button or moving a slider.
Windows 11 maximizes the use of touch screen technology by integrating multi-touch gestures. Its touch-first design allows users to employ various gestures, such as pinching to zoom, swiping to scroll, and tapping to select, enhancing the overall navigation and interaction experience.
How to Disable Touch Screen Feature in Windows 11
If you wish not to use the touchscreen functionality in Windows 11, follow these steps:
- Press the “Windows” key on your keyboard or click the Start button in the bottom-left corner of the screen.
- Type “Device Manager” into the search box and select it from the list of results.
- In the Device Manager window, look for the “Human Interface Devices” category and click on the arrow to expand it.
- Find “HID-compliant touch screen” in the drop-down list.
- Right-click on “HID-compliant touch screen” and select “Disable device” from the context menu.
- A warning will pop up, notifying you that the device may stop working. Click “Yes” to confirm that you want to disable the touch screen.
Remember, you can re-enable the touch screen at any time by going back to “HID-compliant touch screen” under Device Manager and selecting “Enable device”.

Windows 11 Settings Navigation
Accessing Windows 11 Settings
To disable the touchscreen feature in Windows 11, you’ll need to navigate your way through several layers of the new operating system’s settings. Start by clicking on the Start button located in the center-left of your taskbar, on the bottom of your screen, and select the Settings icon represented by a gear symbol.
Opening Device Manager
Once the Settings window opens, look for the System category. Clicking on this option will expand various settings related to your system’s performance and hardware. Now, scroll down to look for and click on the “Device Manager” option.
Navigating Device Manager
After the Device Manager window opens, you’ll see a list of all hardware components connected to your computer. You will need to locate the section labeled as “Human Interface Devices”. Click on the arrow or the plus sign located next to this option to reveal a drop-down list of all the associated components.
Disabling the Touchscreen
In the drop-down list, you should see an option labeled as “HID-compliant touch screen”. Once located, right-click on it and select the “Disable device” option in the context menu that appears. A dialog box will appear, asking for confirmation of your action. Confirm by clicking on “Yes”. After a moment or two, your touchscreen should be disabled.
Verifying the Results
To confirm whether the touchscreen on your Windows 11 device was successfully disabled, you can attempt to interact with your screen through touching. If the device no longer responds to touches, the process was successful. If not, you may need to go back and repeat the steps.
Reverting the Changes
If you want to reactivate your touchscreen, repeat the steps you followed to disable it, but select the “Enable device” option instead. Remember, adjusting hardware settings can have a significant impact on your system’s functionality, so it’s essential to revert changes if you’re unsure about any modifications.

Turning Off Touch Screen Option
Steps to Disable Touch Screen in Windows 11
- Press the “Windows” key on your keyboard, or click the “Start” button at the bottom of your screen to open the Start Menu.
- In the Start Menu, type “Device Manager” and press “Enter”. This will bring up a list of all the devices and hardware plugged into or built into your computer.
- In the Device Manager window, find the category “Human Interface Devices”. Click on the arrow beside it to expand the list of devices under this category.
- Under “Human Interface Devices”, you’ll find several items that control different input methods. Look for “Touchscreen” or something similarly named. This will vary depending on the make and model of your computer.
- Once you find the touchscreen device, right-click on it. A context menu will appear with various options.
- In the context menu, look for the “Disable device” option and click on it. A pop-up window may appear asking you to confirm that you want to disable the device. Click “Yes” to proceed.
Confirm the Changes
- After disabling the touchscreen, close the Device Manager. To ensure the touch screen has been turned off, try touching your screen at different points. If the cursor does not move, then the touch screen has been turned off successfully.
- Remember: If you wish to turn the touch screen feature back on in the future, follow the same steps. However, instead of clicking on “Disable device”, you’ll select “Enable device”.
Touch screen technology has revolutionized the way we interact with devices. Nevertheless, having the knowledge and autonomy to disable the touch screen when you wish is an empowering experience.
With a thorough understanding of touch screen technology and the Windows 11 platform, it becomes much more manageable to navigate these digital landscapes. The step-by-step guide discussed provides the right approach to locate the necessary settings, select the appropriate options, and confirm your changes, thereby enabling you to turn off the touch screen option effectively.
As technology continues to evolve, with it comes an ongoing need for acquiring new knowledge, fostering adaptation, and remaining in control of our digital experiences.


[…] that is commonly used as a preventive component in SMART therapy. It works by reducing inflammation in the airways, helping to prevent asthma symptoms. When used in combination with formoterol, […]
[…] of magic to your outdoor space with battery operated outdoor string lights and create unforgettable memories under the […]